

Canelés are a little complicated in the making. Mostly due to the waiting. Waiting two days for the batter to incorporate and flatten, waiting for the beeswax in the pans to set in the freezer, waiting to have enough time in your day to do those things and eventually get to bake them! I'm so happy to finally have my delicious final product: canelés in a donut pan!

You will need 2 c. whole milk, 3 1/2 tbsp. unsalted butter, 1 vanilla bean, 3/4 c. + 1 tbsp. flour, 2 c. powdered sugar, 1 tsp. sea salt, 2 large eggs, 2 large egg yolks and 1/4 c. rum. You will also need organic beeswax, anywhere from 1 1/2 to 3 oz. and an equal amount of unsalted butter. Luckily for me, I still have about a half a pound of organic beeswax left from our fire starter donuts.

Here is the batter that needs to sit for two days in the refrigerator. Start by scraping your vanilla bean and placing it (pod and seeds) in a pot with the 2 c. milk and 3 1/2 tbsp. butter. On medium heat bring to a boil. Remove from heat and cool until you can keep a finger in the milk for a few seconds without getting a burn. While that cools, sift together the flour, powdered sugar and salt.


Stir the eggs and yolks gently with a fork, then gently fold into the dry mixture. Scoop the vanilla bean pods out of the milk mixture and place in another bowl (the bowl you will be refrigerating the batter in). Gently pour the warm milk mixture in with the eggs and dry ingredients. Stir until well blended, but can still be lumpy.


Strain the lumpy batter into the bowl with the vanilla bean pods. Press through the strainer as needed.
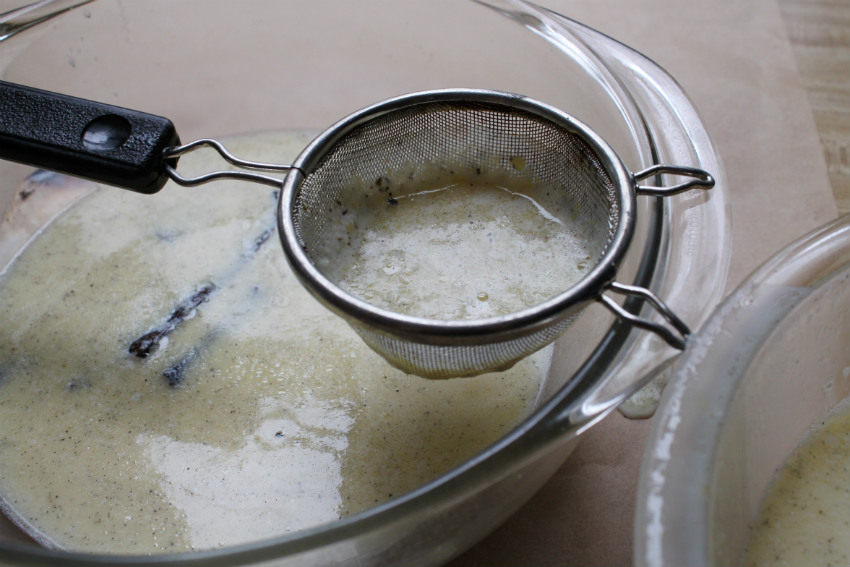

Finally, add the rum! Stir gently until incorporated.

Wrap bowl well. Mine has a fitted lid, so I did plastic wrap below the lid and foil over the lid. Let rest in refrigerator for two days. Stir it after 24 hours, and place back in refrigerator for 24 more.

*****48 HOURS LATER*****
You're ready to bake! Preheat your oven to 475º. Melt your organic beeswax in a stainless steel bowl over a pot of simmering water. Take off heat and add an equal amount of butter. If it starts to set up, you can put the bowl back over the steam.
Cover a baking sheet with foil and set in the oven. Place two donut pans on the foil covered pan and let heat for about ten minutes.


After ten minutes, carefully remove donut pans from oven and set on a cloth or rack. Begin to coat your pans by applying the hot wax/ butter mixture with a paintbrush (one you don't care for much) in the donut pan cavities. It will be oily and not stick to the pans at first. Watch it. At the first sign of whitening/cooling, start working your wax all around in the cavity, watching as the wax begins to coat all surfaces. Repeat for all donut cavities.


If you end up with parts that are too thick or lumpy, work them out with a paper towel. If you totally screw up, set the pans back in the 475º oven on the foil-lined tray for 5-10 seconds, which will melt the wax and let you pour back into the bowl. Then you can try again.
Freeze your pans for one hour to cool and set wax. At this time, also gently stir your refrigerated batter and set back in the refrigerator again.

*****ONE HOUR LATER*****
You're ready to bake. Your oven should still be cranking along at 475º. Replace the foil on the pan in the oven if there are any wax drips on it for any reason. Stir the batter gently, and fill each donut cavity with about 1/4-1/3 c. of the batter.

Here's where it gets kooky, but it works!
Baking instructions:
1. Place donut pans on foil-lined tray in 475º oven and immediately turn oven down to 450º.
2. Bake for 7 minutes, remove from oven and let rest on counter for one minute to deflate.
3. Bake for 7 more minutes, remove from oven and let rest on counter for one minute to deflate.
4. Lower oven to 375º and bake for ten minutes.
5. Remove donut pans AND baking tray from oven, let pans rest for one minute on counter to deflate, then place directly back in oven (with no tray beneath them).
6. Bake for ten minutes and remove from oven to check for over-browning and to deflate if needed.
7. Bake for five more minutes. Stop.
That is a total of 39 active baking minutes, just so you know.
This photo is after the first seven minutes of baking and minute of resting:

Here they are out of the oven, done.

You want to still have a custardy softness in the center while the edges become deep, dark, golden brown. If you need another five minutes, go ahead, but I stopped here. You do not want to toughen the centers by overcooking.
Now, just flip out of pans, let cool just a bit, and dig in! They were perfect. I was dubious through the whole baking process, but they are delicious. Crunchy and chewy on the outside, soft and custardy on the inside.

I think once you've baked these once, they become much less daunting. This might be one of my most adventurous donut pan ideas yet, but they are totally worth it!


No comments:
Post a Comment